
To enhance communication and record the flawless procedure of any software,
screen recorders hold invaluable importance. Content creators constantly
seek screen recording options to produce high-quality educational videos and
step-by-step tutorials.
If you are also looking for ways to
record your required screen on the mobile application, this guide will
provide the best screen recorders. Moreover, you will also understand how to
screen record on Android and the functionalities they provide.
Part 1. How to Record With Android's Screen Recorder
Most mobile phones come with built-in screen recorders that provide a system to seamlessly record the screen of your smartphone. These interface-capturing tools are mostly used for general purposes or to facilitate beginners. You can capture any activity and record the procedure of any software usage to send to your friend or incorporate it in educational videos.
To learn more about the built-in screen recording program, the below section will show how to record audio on Android:
-
Step 1:To begin with, access the Notification panel of your mobile by scrolling from the top to bottom. From here, locate the Screen Recorder present within the panel and tap on it.

-
Step 2:Next, a new window will pop up where you have to choose whether you wish to incorporate the media and mic. Finally, press the Start Recording button to initiate the interface capturing process.
-
Step 3: The recording will proceed to capture your desired screen or application. Subsequently, it also provides you with the pause, save, and editing buttons to seamlessly record any high-quality screen. Lastly, click on the Stop option indicated by the square button to save the captured video.
Part 2. How to Capture Screen on Android with a Third-party App
If you do not have the built-in screen recorder in your phone, you can opt for the alternative option from the Play Store. It provides a range of choices for this purpose that also offer advanced functionality for advanced-level screen recording. By enabling a few permissions that the app requires, you can capture any screen on the smartphone with the real-time audio addition.
As we are taking Screen Recorder - XRecorder in this case, this tool also gives the functionality of adding annotations and markup to boost the creativity of recorded videos. In the below section, we will see how to utilize sound recording software for Android to record any clip and process to make engaging content:
-
Step 1:Firstly, open the app and give all the permissions it requires. From there, go to the Recorder option displayed on the main interface indicated in the orange circle to initiate screen capture. Moreover, you can also go to the required screen and tap on the Recorder icon provided by the floating toolbar of the third-party screen recorder.
-
Step 2: After the capturing process is initiated, choose the Pause button when needed or use the options offered by the platform to edit the video in real time. Finally, when you are done with the interface capture, hit the Stop icon, indicated by a red square on the floating bar, to save the video automatically on your device.
Part 3. How to Record Screen With Sound Online
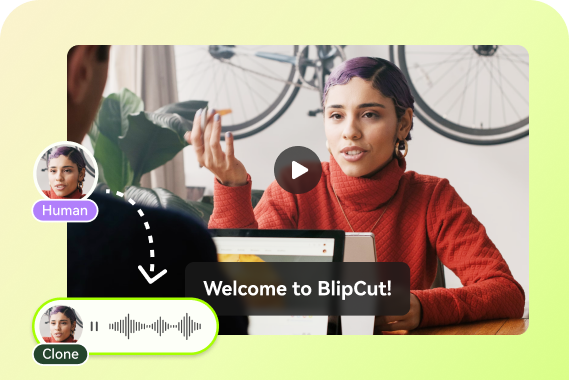
Having explored how to record sound online using the screen recorders discussed above, you must have come across their downsides. You cannot incorporate a separate voice-over to the recordings through the above mentioned tools, raising a need for an efficient platform. Luckily, BlipCut Video Translator provides extensive features and advanced functionalities to record your real-time voice or integrate pre-existing audio into videos for compelling results.
Key Features
-
Translates the real-time voice into another language efficiently for enhanced accessibility.
-
Converts the audio files into other languages by keeping the tone intact.
-
Provides the transcript of the audio file by transforming the speech into text form accurately.
-
You can perform bulk translation of multiple videos at the same time.
-
Features the option of downloading generated subtitles separately in SRT or VTT format.


Steps on How to Record Screen With Sound Using BlipCut AI Video Translator
Let's discuss the steps to have full comprehension of how to record the sound to incorporate into the video using this Android screen recording alternative:
-
Step 1. Access the BlipCut AI Video Translator from the Browser
To initiate the process, go to the browser and open the homepage of BlipCut AI Video Translator. Now, click the Video Translator button to be directed to the next page automatically.
-
Step 2. Navigate to the Record Function of BlipCut
In the following interface, locate the Upload File(s) drop-down and expand it to opt for the Record option to initiate the process.
-
Step 3. Select the Screen Recording Options
Next, configure the Video Settings by specifying the screen recording preference to the tool. Moving forward, expand the microphone drop-down menu and select the camera if required. Once done, select the Start Recording button to move to the next interface.
-
Step 4. Select the Window That You Need to Record
When the next window appears on the screen, select the window that you need to share and hit the Share button at the bottom right of the screen.
-
Step 5. Execute the Screen Recording Process
Once the settings are configured, head to the floating toolbar located at the top of the screen and press the Red circle to start recording. Start speaking in your device’s microphone and press the same Red button to abort once you are done recording. The recorded screen video will be automatically downloaded to your device’s storage. Moreover, it will be imported within BlipCut’s translation interface.
-
Step 6. Enter the Translation Settings for the Recorded Video
As the recently recorded video is brought to the translation interface, head to the Source Language menu to select the original video language. Now, expand the Target Language(s) drop-down menu to select the required targeted language from the list. Once you have made the translation settings, click the Translate button at the bottom of the window.
-
Step 7. Review The Translation and Export
After the process is successfully executed, review the translations and make changes to them if required. Once you are satisfied with the results, head to the bottom of the video preview window and press the Export button to save.
-
Step 8. Download the Screen Recorded Video
From the Download File window, select the Download Video box and press the Download button to download the screen-recorded video to your device. Optionally, you can also save the video’s audio and subtitle files by checking their respective boxes.
You May Also Like:
Conclusion
All in all, a screen recorder serves a significant purpose when recording any activity on the phone or capturing the procedure on the smartphone. If you are unaware of using interface capturing, this guide has provided you with the usage of the best screen recorders.
Moreover, this guide has also introduced you to BlipCut Video Translator and shows how to capture audio on Android using this tool. This tool not only facilitates the addition of sound to the video but also assists you in translating the audio into speech of any language.
Leave a Comment
Create your review for BlipCut articles

Blake Keeley
Editor-in-Chief at BlipCut with over three years of experience, focused on new trends and AI features to keep content fresh and engaging.
(Click to rate this post)