Step-by-Step Guide
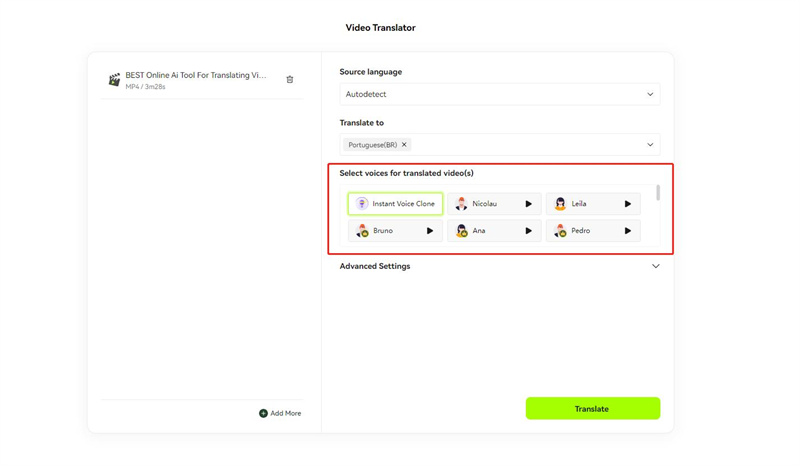
> Step 1: Upload & Select Voice
We provide you with several free but natural-sounded AI voices. Or you can upgrade to enjoy the ultra-realistic premium voices if you like.
> Step 2: Edit Voice
Change Voice
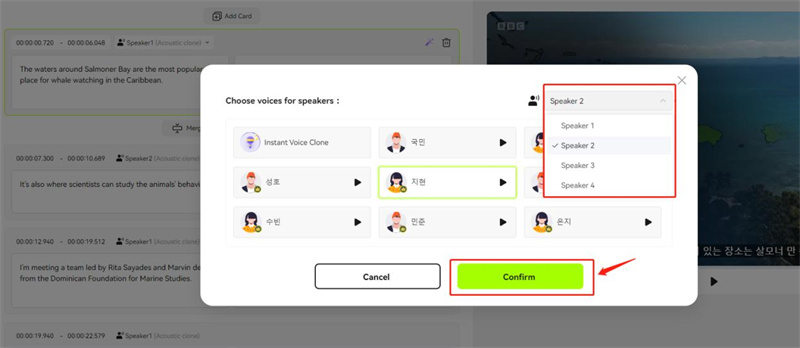
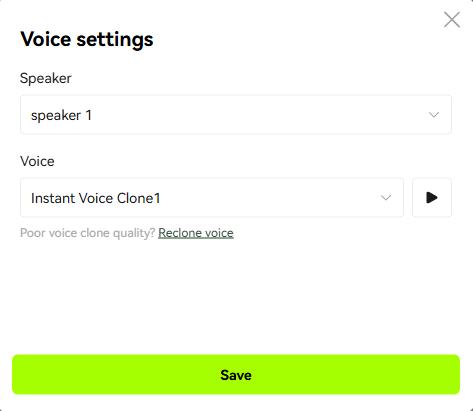
Click on the voice icon next to the speaker for voice setting. Select the speaker you want to modify in the pop-up window, then select a voice you want and click the Save button.
Reclone Voice
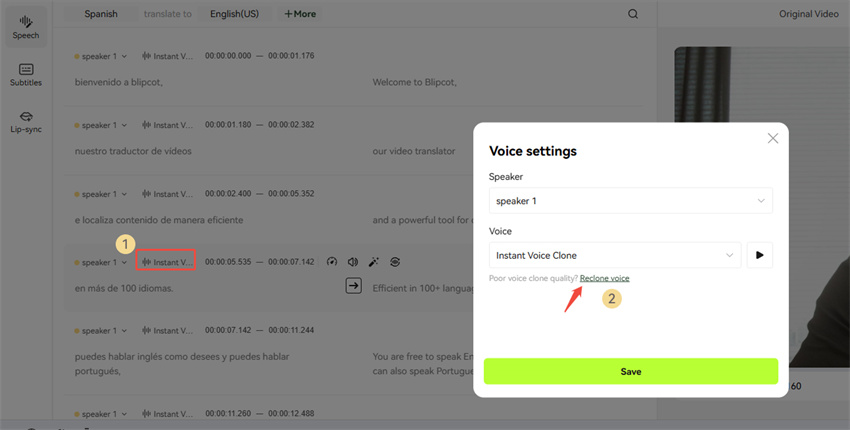
Not satissfied with the cloned voices? No worries, you can clone voices again while editing. Most importantly, re-cloning voice does not consume extra credits! Hit on the voice icon and you'll see the Reclone voice option.
Click it, and you'll see all the clips from the speaker you want to re-clone. Select the clearest, noise-free clips to re-clone. Note that choosing high-quality audio clips longer than 30 seconds will result in higher-quality clones.
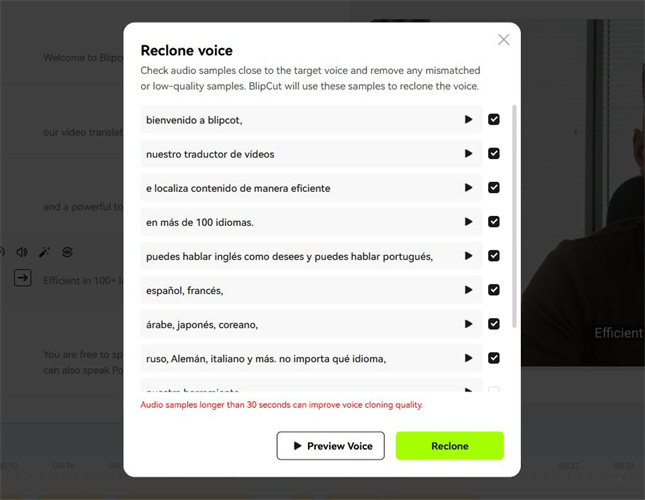
Finally, it will automatically replace it with the latest cloned voice for you. You can preview it and then click the Save button.
Adjust Volume
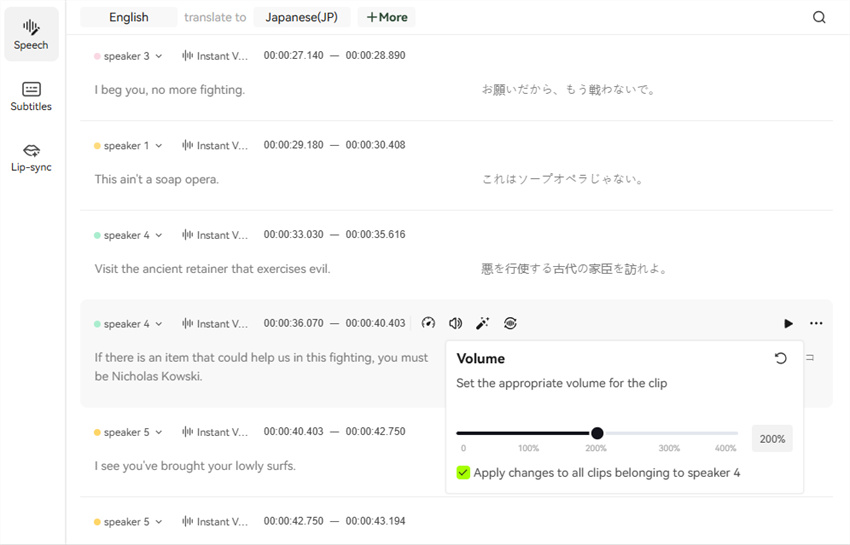
You can also adjust the volume of generated clips within BlipCut. Tap the clip you want to adjust, then click the volume icon and slide to your desired level. Additionally, you can apply the adjustment to all clips for that speaker with a single tap.
Note: If a specific word or number cannot pronounce correctly, please read this guide for voice editing tips.
> Step 3: Click "Play" Icon
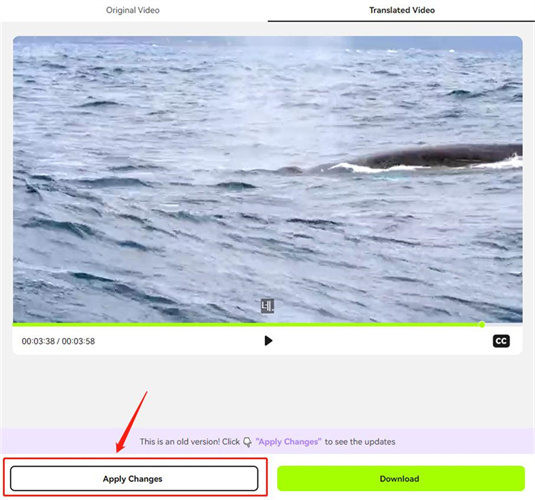
After finishing adjustment, please click on the "Play" icon to apply changes and preview the result before downloading.
> Step 4: Save New Translated Video
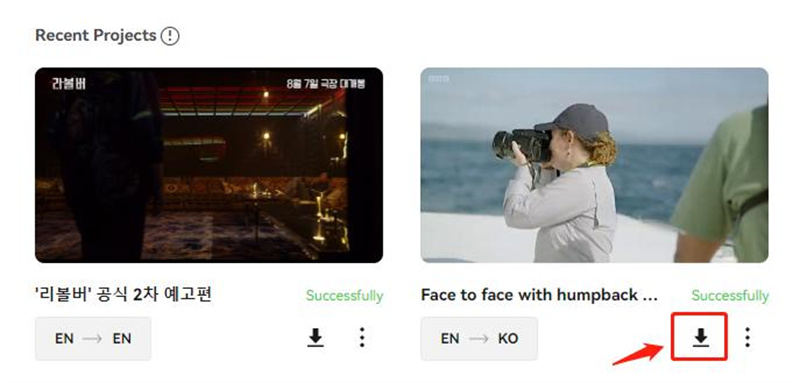
Finally, you can save the new version of the translated video from the Recent Projects.
Frequently Asked Questions
What if the speaker is misidentified?
Don't worry, you can just manually select the correct speaker based on the transcribed text and regenerate the video.
What about inconsistencies in the same speaker's voice?
You can try to select a specific voice for each speaker without using the voice cloning feature. If you still want to clone each speaker's voice, you can contact us and we will try to help you solve the problem.
