As a content creator, you may always look for the best software to add voiceovers to your videos. One such tool for creating engaging content is iMovie, which is filled with advanced editing features. This tool allows users to elevate content by adding professional-quality voiceovers to their polished videos. Thus, if you are wondering how do I do voice overs in iMovie, take guidance from this article.
Part 1. How to Do Voiceover on iMovie? 3 Methods
Throughout this part, we will provide you 3 different methods on how you can add voice over to videos. With these methods, create some of the most stunning and eye-catching videos for your social media or online channel:
Method 1. Upload Your Own Audio to iMovie
As discussed, this built-in video editing software allows users to create Hollywood-style movies and videos with intuitive features. You can add different audio formats of voiceovers, such as MP3 and more, from your library or iCloud. Now, let's go through the following steps and learn how to add audio to video using iMovie.
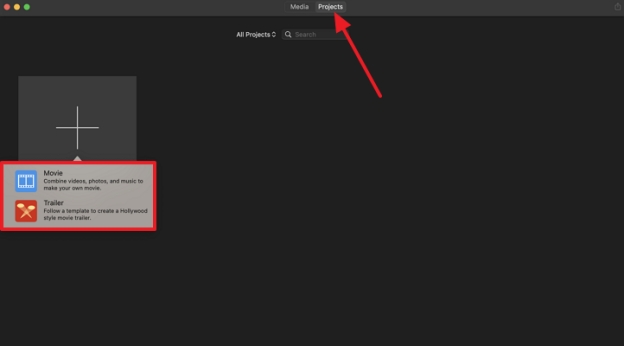
Step 1:Launch the iMovie software on your MacBook, and in the Project tab, click the + option to open a drop-down menu. From here, choose any of the two available options and head to the main editing interface.

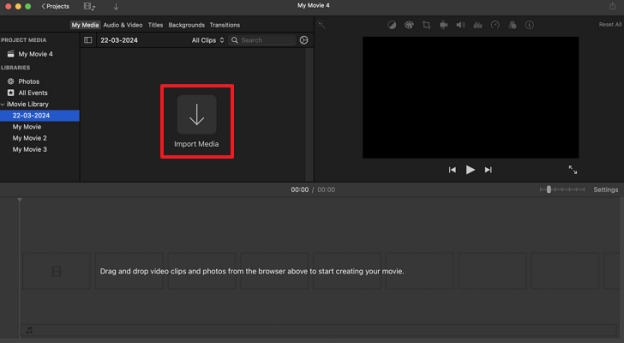
Step 2:After that, press the Import Media option in the Media panel and choose the desired video and audio files using this tool.

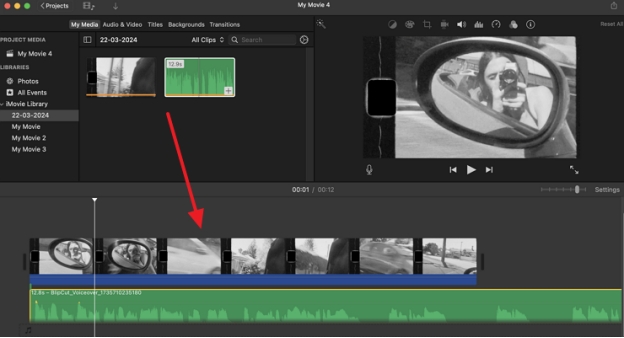
Step 3:When your audio and video files are added, drag them into the timeline panel below and sync them by dragging them along the timeline area.
Method 2. Record Audio on iMovie
iMovie is also capable of providing you with recording facilities, which is much simpler and more convenient. You can record your own audio file with this tool by using its native recording feature. Furthermore, it lets you change the input source, volume, and more to achieve that excellent voiceover video. Now, follow the given steps and learn how to record audio on iMovie with ease:
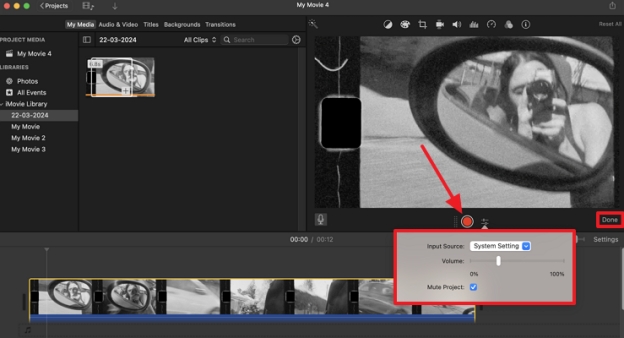
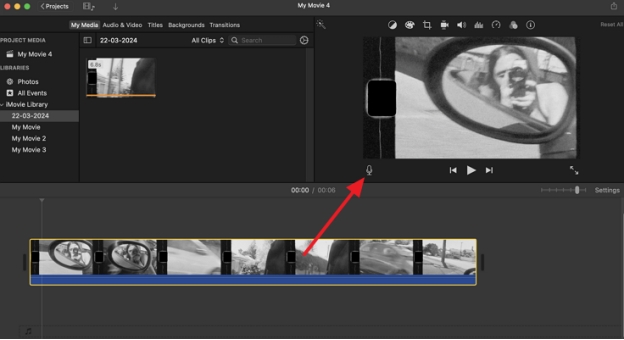
Step 1:After your video is imported to this tool, drag it across the timeline section below and head to the Preview panel. Now, hit the Microphone icon to start recording your own audio.

Step 2:Upon doing so, click the Settings icon below the video preview, adjust the Volume using the slider, and add an Input Source in the drop-down menu. Once that’s done, press the Record button to record your audio for the video, and stop the recording when you are done. As the audio is recorded, you can preview it in the timeline section, replace it according to your video, and hit Done when satisfied.
Method 3. Record Audio Directly on Mac
If you want a much simpler method to record audio on Mac as an alternative to the iMovie tool, use the QuickTime Player. With this tool, users can quickly produce high-quality audio recordings with adjustable volume. To understand how to record audio on your Mac directly, follow the given steps:
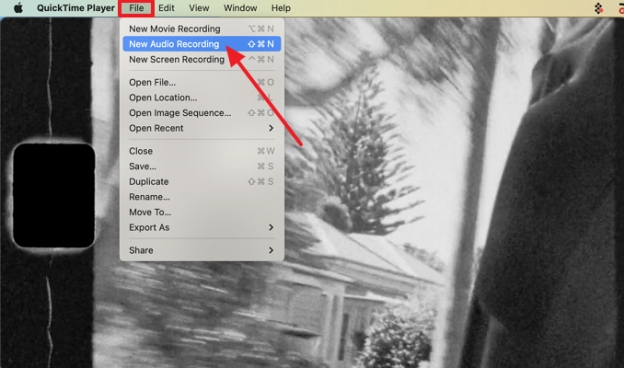
Step 1:Open the desired video on QuickTime Player on your Mac and head to the top toolbar to choose the File option. From the drop-down menu, select the New Audio Recording option to display a small Audio Recording dialogue box.

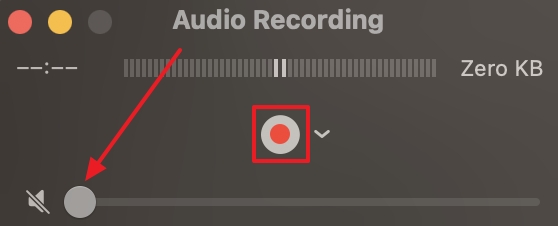
Step 2:In the Audio Recording box, click the Recording button and adjust the Volume Control bar by dragging it right. When you are glad with the recording, press the Stop button to finalize the audio.

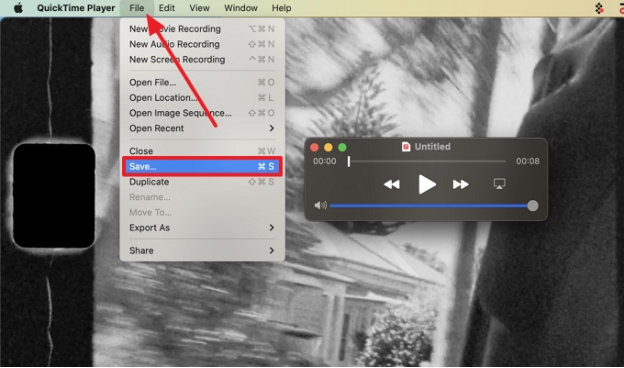
Step 3:Afterward, navigate to the File tab at the top toolbar and choose the Save option in the drop-down menu to save the recorded audio.

Part 2. How to Add A Voiceover to a Video with BlipCut?
After learning how to do voice recording on iMovie, you got to know about its functionality. However, if you are looking to create professional and unique voiceovers in over 1300 realistic voices, BlipCut AI Voiceover is the right choice. This excellent tool has an AI voiceover feature that contains several voices in over 140 languages, eliminating the need for voice actors and audio recordings.
Top Features in BlipCut Voiceover
-
Generate voiceovers in over 90 languages and accents.
-
Instantly convert text to speech online with AI.
-
Its read-aloud feature allows you to read a speech in over 1300 natural voices.
-
Easily Add voiceovers to videos in one platform.
-
More than an AI voiceover generator, its AI video translation, subtitle generation and more are the industry-leading features.
Guide on How to Add Voice Over to Video Using BlipCut
After understanding the voiceover features of BlipCut Voiceover, let’s look at how this feature can help you add voices to videos by following the given comprehensive steps:
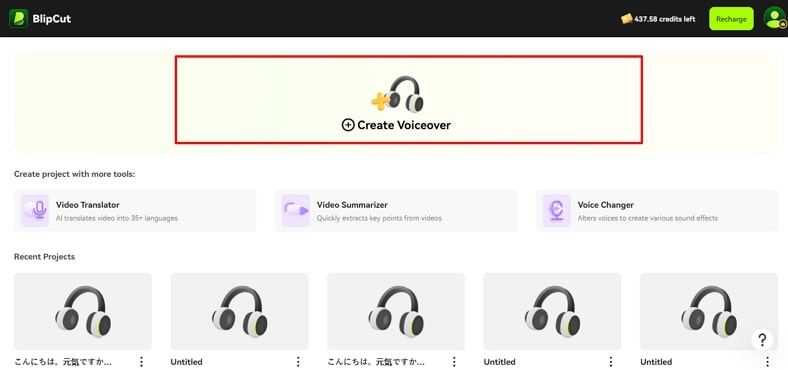
Step 1. Access BlipCut AI Voiceover and Create
Head to the BlipCut AI Voiceover page on your browser and click the Create Voiceover button to head to the new screen.

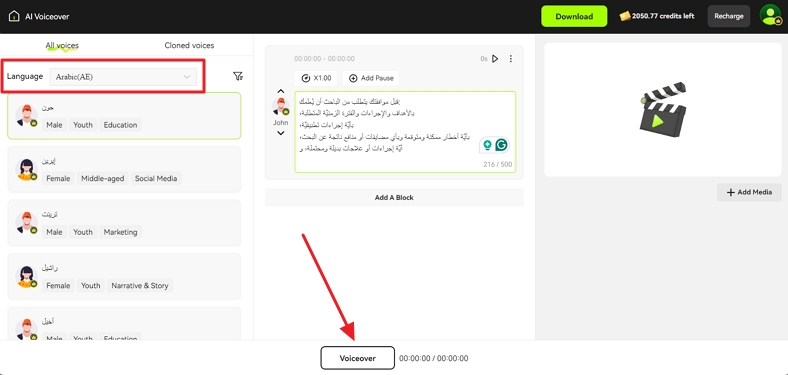
Step 2. Add Voiceover and Desired Text
When on the next screen, choose a voiceover from the All Voices tab and click the + icon on the selected voice. Write the text you want the voice to narrate in the Enter Your Text Here box. After that, add a video by pressing the +Add Media button and hit Voiceover to start.

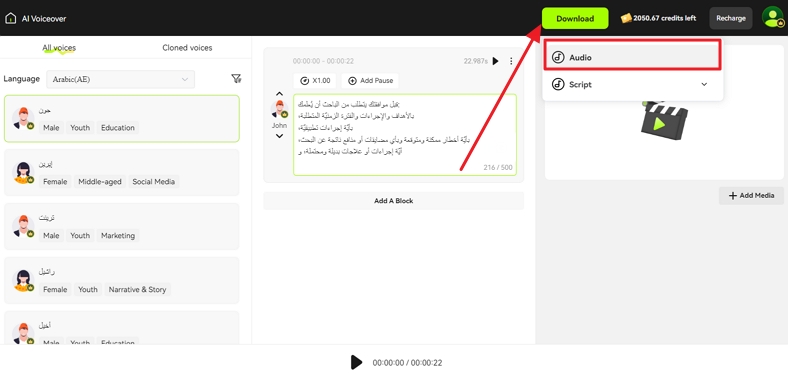
Step 3. Download the Final Voiceover Content
Once the voiceover is added to the video, click the Download button at the top and save it as video, audio, or script.

Conclusion
This article explains how voiceovers can convey emotions and add depth to videos through different narratives. So, by using the iMovie voiceover tool, we learned different methods on how to add voiceovers to videos. However, one of the best tools that doesn't even require recording is BlipCut Voiceover. With this tool, narrate videos in over 1300 realistic voices in several languages by inputting text.
Leave a Comment
Create your review for BlipCut articles






Blake Keeley
Editor-in-Chief at BlipCut with over three years of experience, focused on new trends and AI features to keep content fresh and engaging.
(Click to rate this post)