Face swapping has become increasingly popular for creative photo edits, generating hilarious images, making your group photos more fun, or experimenting with different facial expressions. Adobe Photoshop is a popular tool for performing realistic face swaps. But whether you're a beginner who doesn't know how to face swap in Photoshop or want to improve your Photoshop editing skills, no worries. This post covers the entire process of mastering free Photoshop face swap. From selecting the right photos to blending the swapped faces seamlessly, it will explain everything about how to swap faces in Photoshop!
Part 1: How Do I Swap Faces in Photoshop
Photoshop provides powerful tools for face swapping, allowing you to achieve realistic and precise results. It is often chosen for professional-quality face swap needs and fun. Face swap Photoshop free involves a few key steps: selecting faces, copying and pasting, aligning, and blending to create a natural look. Here is a detailed guide on how to swap face on Photoshop:
Step 1. Open Both Image Files
To face swap on Photoshop, the first step is to open the two photos in Photoshop by clicking "File"> "Open." For the best and most natural results, both images should have the same lighting and minimal shadows, with the models looking in the same direction.
We will use the body of the first image and the face of the second model.

Step 2. Choose the 2nd Model's Face
Now, select the Face layer from the "Layers" panel. Then, pick the "Lasso Tool" or "Quick Selection Tool" from the "Toolbar" on the left side of the window. Outline the important features of the model's face, such as eyes, nose, mouth, eyebrows, etc. Choose "Edit"> "Copy" from the drop-down menu.
Step 3. Paste and Position the Model's Face
Next, press "Ctrl + V" for Windows or "Command + V" for Mac to paste the selection onto the Body model. You can use the "Move Tool" from the "Toolbar" to position the model's face correctly.
Step 4. Resize and Rotate the Face
From the "Layers" panel, select the new layer with the face and rename it "Face." For better accuracy, you can use the "Opacity" setting to make the face layer semi-transparent.
It's time to tap "Ctrl + T" or "Command + T" to activate the "Transform Tool" or select "Edit"> "Transform"> "Scale/Rotate" to resize and rotate the face. Hit "Enter" or "Return" (for Mac) when done.
Step 5. Duplicate the Background Layer
Duplicating your background layer is necessary to retain the original image for touch-ups.
Select the layer containing the model's body. If the original image was imported as a JPEG, select the "Background Layer." Look at the upper right corner of the "Layers" panel, tap the four horizontal lines, and choose "Duplicate Layer." Name it as the "Body" layer.
Step 6. Load Selection in the Body Layer
From the "Layers" panel, select the "Face" layer. Tap "Select" at the top of the window to pick "Load Selection" in the menu. You will see a pop-up with "Face Transparency" as the "Channel." Ensure the "Invert" box is unchecked and the "New Selection" circle is checkmarked. Tap "OK."
Step 7. Create a Slight Overlap of the Body & Face
Next, click the eye icon for the "Face" layer to make the new face invisible, but don't deselect your selection. Choose the "Body" layer, and from the top menu of the window, press "Select"> "Modify"> "Contract." Set the amount to "10" pixels and click "OK."
Step 8. Delete the Face from the Body Layer
While the "Body" layer is selected, press "backspace" or "Delete" (on Mac) to remove the area beneath the face. Press "Ctrl/Command + D" to deselect this layer.
Step 9. Blend Them Well
Now, tap the eye icon for the "Face" layer, and you will see both body and face again. While selecting both the "Face" and "Body" layers while holding the "Shift" key, click "Edit"> "Auto-Blend Layers…" Select "Panorama" and checkmark both the given options. Tap "OK."
Step 10. Refine If Needed
Lastly, when you are all done, zoom out to check the overall look. You can make minor adjustments as needed. Save your Photoshop face swap image, and that's it!
Part 2: How to Face Swap without Photoshop: AI Method
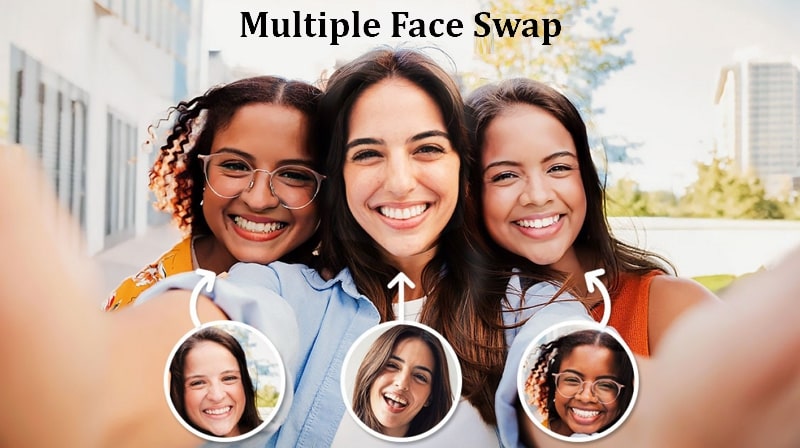
No doubt, some users find difficulty in learning how to swap face on Photoshop. But don't worry. Besides using the face swap Photoshop technique, you may use an online AI face swap tool like Fotor to complete the task.
Its intuitive interface and automatic face detection algorithm will save time and effort. It ensures precise swapping and alignment to deliver impressive results quickly. You also have complete control over the output to adjust the size, position, rotation, and transparency of the swapped face to achieve the desired results. So, instead of Photoshop swap faces, here is how to do it using Fotor AI Face Swapper:
Step 1: Firstly, open the Face Swap tool by Fotor and click "Swap Face Now."
Step 2: Drag and drop the original and the target face. Then, press "Swap."
Step 3: Once the face is swapped, press "Download" or tap "Edit" to refine the output.
Conclusion
Knowing how to swap face in Photoshop opens up endless possibilities for creative photo editing. Whether you choose the manual Photoshop method or a quick AI tool, face swapping is a fun and valuable skill.
But after using face swap Photoshop, if you want to translate your videos, BlipCut AI Video Translator is the ultimate solution due to its ease of use, high accuracy, and quick processing. Give it a try now!


Leave a Comment
Create your review for BlipCut articles

Blake Keeley
Editor-in-Chief at BlipCut with over three years of experience, focused on new trends and AI features to keep content fresh and engaging.
(Click to rate this post)