A podcast's success or failure depends on its audio quality in the fast-paced digital world of today. Adobe Podcast Enhancer can help with that. This potent tool, which is revolutionising the game for creators, is made to easily improve sound quality and clean up recordings. We will go over what you need to know about utilising adobe podcast enhancer in 2025 in this article.
- Part 1. What is Adobe Podcast Enhancer?
- Part 2. How Adobe Podcast Enhancer Cleans and Elevates Your Audio
-
Part 3. Step-by-Step Guide for Using Adobe Podcast Enhancer
HOT
- Bonus Tip: Use BlipCut AI Video Translator With Adobe Podcast Enhancer for Global Reach
- Part 4. FAQS about Adobe Podcast Enhancer
Part 1. What is Adobe Podcast Enhancer?
Adobe Podcast Enhancer is a special technology for raising the audio quality of voice recordings. Audio is smoothed down and given the appearance of being recorded in a professional studio with Adobe Podcast Enhancer. It balances audio levels, eliminates unwanted sounds, and improves clarity using machine learning.
Unlike traditional audio editing software that requires manual adjustments, adobe podcast enhance automates the process. Users can turn unpolished, amateur recordings into polished, clear audio with a few clicks. This product provides both novices and experts with an easy-to-use yet effective method of producing high-quality voiceovers, interviews, and podcasts without the need for extensive technical knowledge.
Part 2. How Adobe Podcast Enhancer Cleans and Elevates Your Audio
Adobe Podcast Enhancer takes your raw recordings and polishes them into professional-quality audio with minimal effort. Let us examine how Adobe Podcast Enhancer improves and purifies your audio for the best possible listening experience.
● Removes Background Noise Instantly
The ability of Adobe Podcast Enhancer to easily eliminate undesirable background noise is one of its best features. Distractions like keyboard clicks, street noise, and fan hums are cleverly detected and eliminated without affecting the quality of the primary speech recording.
● Balances Voice Levels Automatically
Inconsistent audio levels can make your podcast or video feel unprofessional. The adobe podcast enhance audio automatically, adjusting the volume levels, making the speaker’s voice steady and clear throughout the entire recording.
● Enhances Speech Clarity and Warmth
In addition to cleaning up the audio, Adobe's AI makes small adjustments to make voices seem more warm and organic. It fills up narrow recordings, smoothes harsh tones, and increases speech frequencies to give them a richer, more polished sound.
● Offers One-Click Simplicity for All Users
Perhaps the most impressive part of adobe podcast voice enhancer is how easy it is to use. You do not have to spend hours adjusting settings or be an audio professional. Just upload your movie, click a button, and let Adobe's AI take care of the rest. Because of the enormous time and energy savings, the one-click workflow is both user-friendly for novices and robust enough for experts.
Part 3. Step-by-Step Guide for Using Adobe Podcast Enhancer
Whether you are an expert podcaster seeking quicker results or a novice with no editing experience, Adobe Podcast Enhance's clear, easy-to-use interface makes it suitable for all users. The sound quality of your podcast can be greatly enhanced with a few easy actions. Here's exactly how to easily improve your recordings with Adobe:
Step 1: Select the Enhance Speech Option
Visit the official website of adobe podcast audio enhancer to get started. Look for the Enhance Speech feature, which is typically marked as one of the primary tools, once you are on the homepage. To get started, click on it. In only a few minutes, this potent tool may eliminate background noise, improve speech clarity, and give your audio a polished, studio-calibre sound.

Step 2: Log in with your Adobe Credentials
You will see a Sign In option at the upper right corner of the screen. When you click on it, a request to enter the email address linked to your Adobe account will appear. You can easily and cost-free establish an account if you do not already have one. For Adobe to store your work and provide you with access to all of the enhancing tools, you must sign in.
Step 3: Provide a Video or Audio File
You will be taken to a new page after logging in. You will notice a prominent Choose Files button in the middle. To upload the audio or video file you wish to improve, click on it. A large variety of file types is supported by the podcast adobe enhance, and uploading files is quick and easy.
Step 4: Exporting the Required File
After your file has been uploaded, you will see an Enhance Speech toggle button. To activate Adobe's AI-powered improvement engine, slide this option. The program will begin automatically cleaning your audio by adjusting the level, eliminating background noise, and honing your speech. To save your freshly edited audio file to your device, just click the Download button.
Bonus Tip: Use BlipCut AI Video Translator With Adobe Podcast Enhancer for Global Reach
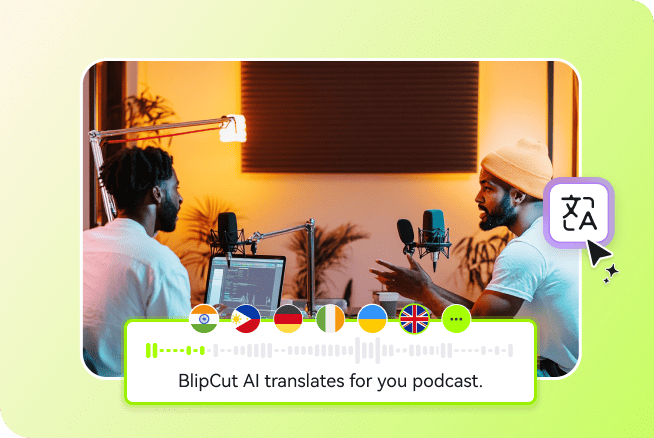
BlipCut AI Video Translator is the ideal addition to Adobe Podcast Enhancer if you want to share your improved videos or podcasts with a worldwide audience. After using Adobe's AI accuracy to clean and improve your audio, BlipCut AI Video Translator makes it simple to translate and localise your material in no time.
Key Features
-
BlipCut AI Video Translator use cutting-edge AI to accurately translate films into a variety of languages.
-
Multiple speakers in a video can be distinguished by the BlipCut AI Video Translator's Speaker Recognition tool.
-
BlipCut AI Video Translator allows you to alter the fonts, sizes, colours, and placements of subtitles in addition to translating them.
Step 1: Launch BlipCut AI Video Translator and add Uploaded Video
Go to the BlipCut AI Video Translator website first. Locate and select the Video Translator function from the homepage. After you have finished polishing your video or podcast with Adobe Podcast Enhancer, click the Upload File option. If you would like, you can also paste a video URL straight in.


Step 2: Select Your Voice and Target Language
Go to the Target Language area after uploading your file. Select if you want your film to be translated into Spanish, French, Japanese, or another language. Next, decide on a vocal style that works well for the subtitle translation. To better distinguish between several speakers, turn on Speaker. Once everything is configured, click Translate to proceed.
Step 3: Examine and Complete Your Subtitles
After automatically scanning your video, BlipCut AI Video Translator will use the translated speech to create an initial set of subtitles. Please take a moment to carefully check these subtitles. To complete the translation process, click Generate Now if everything appears to be in order.
Step 4: Customise the Style of the Subtitle
With BlipCut AI Video Translator, you can alter the way your subtitles show up to make your material more interesting. To completely fit your brand or movie theme, go to the Subtitle tab and adjust the font style, text size, colour, and placement. Customising subtitles keeps a polished and eye-catching appearance for a variety of viewers.
Step 5: Get Your Translated Video and Share It
A pop-up box that guides you through the download procedure will appear once your subtitles are available and customised to your preference. To incorporate subtitles straight into your video, make sure you select the With Subtitles option. Your fully translated, globally-ready content will be saved to your device when you click Export.
Part 4. FAQS about Adobe Podcast Enhancer
Q1. How To Enhance Audio Quality In Adobe Podcasts?
A1: Adobe Podcasts' user-friendly AI capabilities make it incredibly easy to improve audio quality. You must first send your unprocessed audio file to the Adobe Podcast platform.
Q2. How Do I Enhance Audio With AI?
A2: Enhancing audio with AI is a game-changer for creators who want professional results without spending hours editing. Tools like Adobe Podcast Enhancer make it easy by analysing your recording and automatically applying noise reduction, levelling volume, and enriching voice tones.
Q3. Is Adobe Podcast Enhance Free?
A3: A free beta version of Adobe Podcast Enhance is available to users who like to test out its robust capabilities. By doing this, you can use the Enhance Speech tool and other fundamental features without having to pay.
Conclusion
High-quality audio is not merely a nice-to-have in the realm of podcasting nowadays; it is necessary to capture and hold the interest of your audience. This is made easier than ever with adobe podcast enhancer, which uses cutting-edge AI precision to automatically clean, balance, and polish recordings. Tools like BlipCut AI Video Translator provide the next step for those who are prepared to take their improved material even further.
Leave a Comment
Create your review for BlipCut articles


Blake Keeley
Editor-in-Chief at BlipCut with over three years of experience, focused on new trends and AI features to keep content fresh and engaging.
(Click to rate this post)