After uploading the video on YouTube you can notice that automatic captions are enabled. Whether you've uploaded your own captions or have generated the captions through the transcription interface of YouTube, you'll only be able to see the auto-captions on the video.
Unfortunately, YouTube has itself confessed that the auto subtitles aren't 100% accurate.
Thus, after looking at this aspect, if you want to replace captions on YouTube, you can explore the brilliant ways in this guide to replace the auto-captions with the subtitles, and we'll also discuss how to alter the subtitles for videos.
Part 1: How to Replace YouTube Automatic Captions with Subtitles
Removing the automatic captions of a YouTube video isn't possible. However, you can hide the automatic captions after uploading the more accurate and custom subtitles. It implies that if you want to replace the captions for YouTube, you can do it without having to put in any extra effort.
-
Step 1: Navigate to the Video Manager button the YouTube account settings button, and hit the Edit icon afterwards.
-
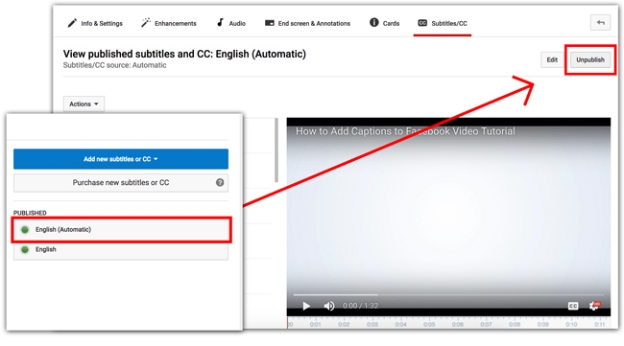
Step 2: To add subtitles to the movie, select the Subtitles/Cc tab and import the desired subtitles.
-
Step 3: In this phase, you'll need to select the language in which you want to add the subtitles and hit the Unpublish button afterwards.

Part 2: Other Common Issues about YouTube Captions & Subtitles
You may face various issues with the YouTube subtitles and captions and the good news is that we've listed the brilliant methods below to overcome the issue you may face with the YouTube subtitles and captions.
1. How to Translate YouTube Videos?
If you're aiming for a YouTube video translator to translate YouTube videos and add attractive subtitles, going for the BlipCut Video Translator will be the best option. With this video translator that adds subtitles to videos in 100+ languages and clones, the voice of a video is also on the cards.
Apart from translating the videos, BlipCut Video Translator also enables you to download the video transcription.
Features
-
Enables you to create and interpret the subtitles for videos
-
Provides an easy-to-use interface; no technical expertise is needed
-
Compatible with Mac, mobile, online, and Windows, supporting most operating systems
-
Extract the video from a URL address no need to download videos
-
Supports the 100+ languages turns the video into the native language
-
Transcribe YouTube to text and download YouTube transcript in one platform
How to translate YouTube videos with BlipCut?
-
Step 1: Tap on the Upload File button to import the video you wish to translate.
Apart from importing the video directly, you can also paste the video's URL address to extract the video from a URL.

-
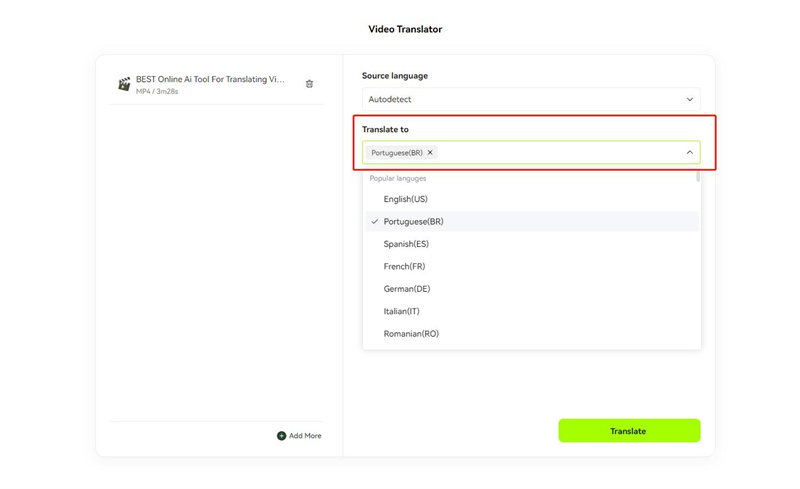
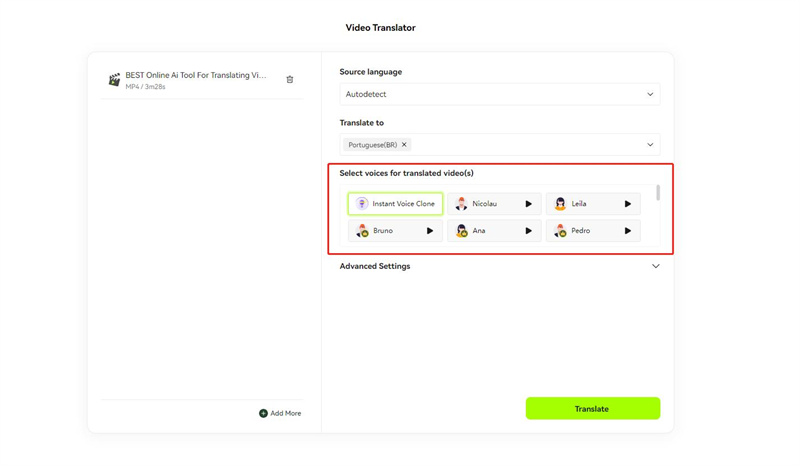
Step 2: In this stage, you'll need to select the language in which you wish to turn the video into.

-
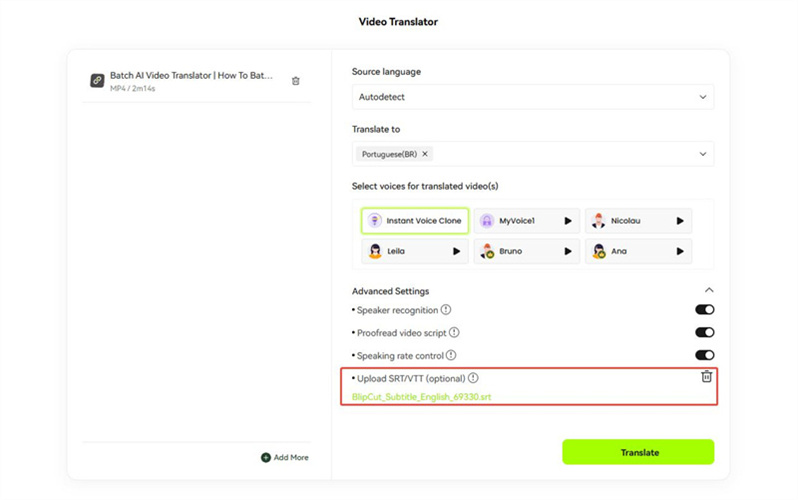
Step 3: VTT and SRT are the common subtitle file format used to display the text subtitles in the video so importing the files in the SRT will guarantee a smooth video translation.

-
Step 4: Select the speaker you wish to use to clone the voice of the video.

-
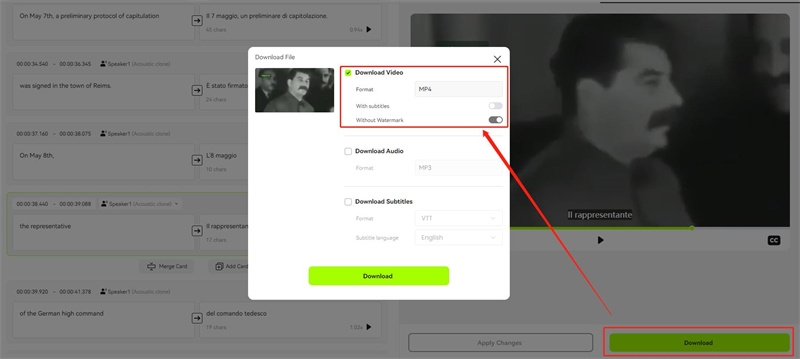
Step 5: Tap on the Translate button and doing so, starts translating the video into the native language. Upon downloading the video, you'll need to select the ''With Subtitles'' button and choose the Download button afterwards to get the video downloaded.

2. How to Edit Captions on YouTube?
Since adding 100% accurate subtitles on YouTube is a tough gig, you may face the issue of subtitles wrongly interpreting the voice of the video. Thankfully, the YouTube captions editor makes it simple to change the captions for YouTube videos. Although editing the YouTube video might take extra time you'll have to be patient while editing the YouTube video captions.
-
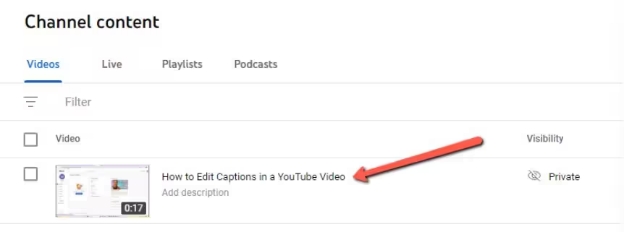
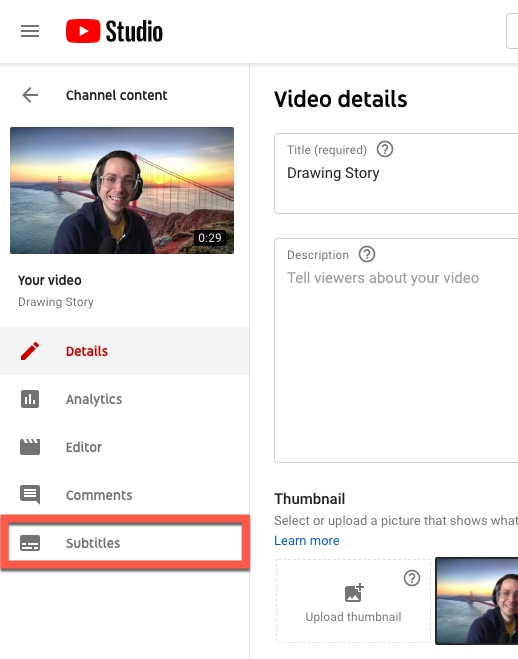
Step 1: After visiting the YouTube Studio, you'll need to tap on the Content button and choose the video you wish to edit. After entering into the sidebar, you'll need to hit the Subtitles button afterwards.

-
Step 2: Verify whether "Automatic" appears in the video caption. You must click the Duplicate and Edit option after seeing the Automatic subtitles.
-
Step 3: Now, you can assess the transcript, and replacing any incorrect text with the correct text is also necessary there. Now, you'll also need to assess the punctuation, capitalization, and spelling. If you want to customize the timing of the subtitles, you'll need to hit the Edit Timings button. After meeting the expectations and editing the subtitles, you'll need to hit the Publish button to upload the video with modified subtitles.

3. Can you add subtitles after uploading to YouTube?
The good news is that you can add subtitles to the posted YouTube video if you've learned how to edit YouTube subtitles and are wondering if you can do so after submitting the video. Fortunately, you don't have to put any extra effort in this regard, as only following a couple of simple steps will be enough to add the captions to the uploaded video.
Here's how to add the captions on YouTube after uploading the video.
-
Step 1: Go to the YouTube studio and use your YouTube account to log in.
-
Step 2: To view the uploaded files, click the Content button. Locate the video you wish to add the subtitles into and hit the thumbnail or title icon to edit the subtitles.
-
Step 3: Navigate to the Subtitles options and press the Add Language to select the language you want to add the subtitles into. In the next phase, you'll need to press the Add button after visiting the Subtitles icon. You now have to add the video's subtitles. Once you're done adding the subtitles to the video, you'll need to hit the Publish button to upload the YouTube video again.

4. How to Darken YouTube Captions?
Customizing the YouTube captions and making them look dark is also possible, as this process only requires you to act upon a few guidelines to put things in order.
-
Step 1: Launch the video you wish to watch. If you didn't turn on the captions on YouTube, you can see the button at the bottom right corner of the YouTube videos.
-
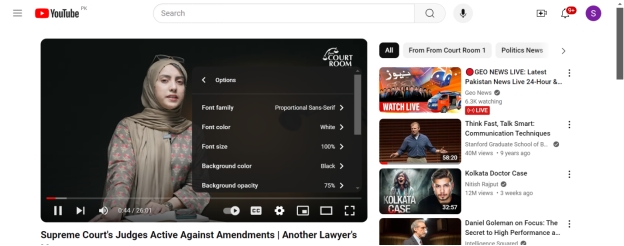
Step 2: Click on the gear icon button and choose the Subtitles/CC button from there. Proceed ahead by selecting the Options button afterwards. Now, you can see the multiple settings like window color, and opacity background. You can use the background color feature to make the color of the YouTube captions look darker.

In Conclusion
Since the effectiveness of the auto-captions on YouTube, it's reliable, you can replace the auto-captions with subtitles. This guide has helped you to replace the auto subtitles with the subtitles courtesy of the insightful step-by-step.
We've also listed the BlipCut Video Translator as the best to translate YouTube videos. With this tool, you've got the chance to add the subtitles to the video and translate the subtitles into multiple languages offering an effortless user interface.
Leave a Comment
Create your review for BlipCut articles





Blake Keeley
Editor-in-Chief at BlipCut with over three years of experience, focused on new trends and AI features to keep content fresh and engaging.
(Click to rate this post)